Google Calendar Agenda
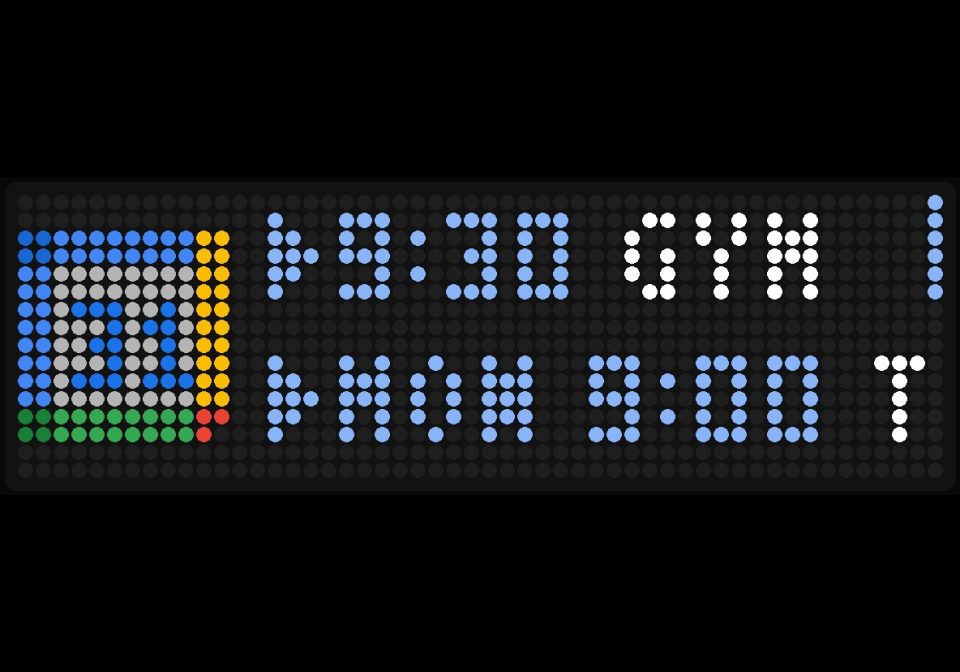
On your display
Your next Google Calendar events on the TC002 – two at a time, scroll through more with the knob.
- Topic
- Social
- Includes
- Script
Runs on
- Does not run on 32×8 (TC001 & DIY) Made for 52×16 (TC002). Needs an AWTRIX that signs in to services.
- Runs on 52×16 (TC002) Sign-in: open the app's settings on your AWTRIX, enter your client ID and press Sign in.
- Does not run on 32×8 with AWTRIX 3 (TC001 & DIY) Made for AWTRIX NG.
Choose your display in the next step.
Script description
Shows your upcoming Google Calendar events.
Controls
- Turn the knob to scroll through further events (a scroll bar on the right shows your position), press it to jump back to the first event.
- Middle button: refresh now.
Settings (Apps tab → gear icon)
Language (English / Deutsch), calendar ID, time zone, number of events, refresh interval, scroll speed, time/day colour, hide when there are no events.
Requires Read-only access to your calendar. Not affiliated with or endorsed by Google.
SETUP: GOOGLE API (one-time, ~10 minutes)
-
Create a project
Open https://console.cloud.google.com, click the project picker at the top → New project, give it a name (e.g. "AWTRIX") and create it. -
Enable the Calendar API
APIs & Services → Library, search for Google Calendar API and click Enable. -
Configure the OAuth consent screen
APIs & Services → OAuth consent screen (newer UI: Google Auth Platform) → Get started.- Enter an app name and your email address.
- When asked which data you want to access, choose User data.
- Audience: External.
- Optional under Data access / Scopes: add .../auth/calendar.readonly
-
Add yourself as a test user
Go to Audience → Test users → Add users, enter the Google account you want to show on the clock and save. -
Create an OAuth client
APIs & Services → Credentials → Create credentials → OAuth client ID- Application type: Web application (not Desktop app)
- Under Authorised redirect URIs add exactly:
https://awtrix.de/oauth/callback - Create it and copy the Client ID and Client secret.
It can take a few minutes until Google accepts the redirect URI.
-
Sign in on the clock
Install the script, open the Apps tab in the AWTRIX web interface, click the gear icon next to Google Calendar Agenda, paste the Client ID and Client secret and press Sign in. Confirm Google's warning "Google hasn't verified this app" via Advanced → Go to … – it is your own project. -
Keep the sign-in alive (recommended)
While your project is in "Testing" mode, Google ends the sign-in after 7 days. Go to Audience and click Publish app ("In production"); after signing in once more it stays valid. No Google review is needed for personal use.
Troubleshooting
- redirect_uri_mismatch: the redirect URI in step 5 doesn't match. Click on the error details – the expected URI is shown there – and add it to your OAuth client.
- access_denied: your account is missing from the test users (step 4).
- "Please sign in via the app settings" on the clock: repeat step 6.
- Another calendar than your main one: in Google Calendar open Settings → [calendar] → Integrate calendar, copy the Calendar ID and paste it into the app setting.
Disclaimer
This app and its setup guide are provided "as is", without any warranty. You set up and manage your own Google Cloud project, OAuth client and credentials yourself and are solely responsible for their configuration and security. The author accepts no liability for misconfiguration, unintended data access, leaked credentials, costs, account restrictions or any other damage resulting from the use of this app or from following these instructions. Keep your Client secret private and never share it. Google may change its console, terms or API at any time; the steps above may then no longer be accurate.
Sign in to view and copy the code of this script.
Discussion 0
Ask a question, suggest a change or share how you use it.
No comments yet. Start the conversation.
Have an idea?
Sign in to ask questions and join the conversation.